
During these past days I was struggling with something that I thought it should be straightforward: I have one repository on GitHub and I wanted to commit changes using two different computers, my PC from home and my Mac from work. At first glance, I was wondering if only cloning my repository in my Mac laptop and start pushing some commits could work, and it worked partially, but when checking the repository from GitHub I discovered some weird issues with the authority of the commit:
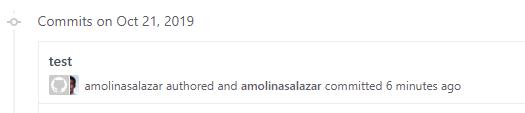
What I was doing wrong?
Understanding how Github links commits to specific users
Git uses the mail address of the commit configuration as a key to identify a contributor of a repository. So if you want to work in the same repository in different computers, you’ll need to specify the mail address when setting up your identity using git config. This configuration will “sign” your commits that you’ll perform. Besides that, you can specify an author’s name too, but there is no a problem if names don’t match between computers. This can be done by the following commands:
$ git config --global user.name "John Doe"
$ git config --global user.email johndoe@example.com
Notice that the parameter --global will set this configuration for all the repositories you have cloned, so if you want to have multiple configurations, don’t use that option. Now, if you are using SourceTree you can just configure a new user account:
In Windows, go to Tools > Options > Authentication
In Mac, go to SourceTree > Preferences > Accounts

There you can add a new user filling up the hosting (in our case, Github) and the protocol (HTTPS or SSH). Which of those should you use? It really doesn’t matter, but normally, SSH protocol will avoid you to enter your password every time you want to make some action. The important thing here to remember is that SSH authentication won’t identify you as the author of your commits.
About the SSH key you have to take a decision, you can reuse the same key from the first computer in the second computer or create a new one and adding it in your Github account (or other). It’s not important what you choose here, but bear in mind that each options has it’s advantages or disadvantages. For example, having only one key can shared across multiple devices can be comfortable, but if one of your devices is exposed you will have to remove the key from your account, create a new one and reconfigure that in all of your computers.
Once you finish, you can start cloning your repository and work in your project normally. Then, when you are ready to start committing some work, let’s check if your repository settings are properly set.
In Windows/Mac, go to Settings (at the top right) and move to the Advanced tab:

If you have set another default account, maybe you will have a different user information here. If it’s different from the identity you want to use for this repository, uncheck Use global user settings and add the right information.
The second thing you need to check is the box on the bottom where you can write your commit message:
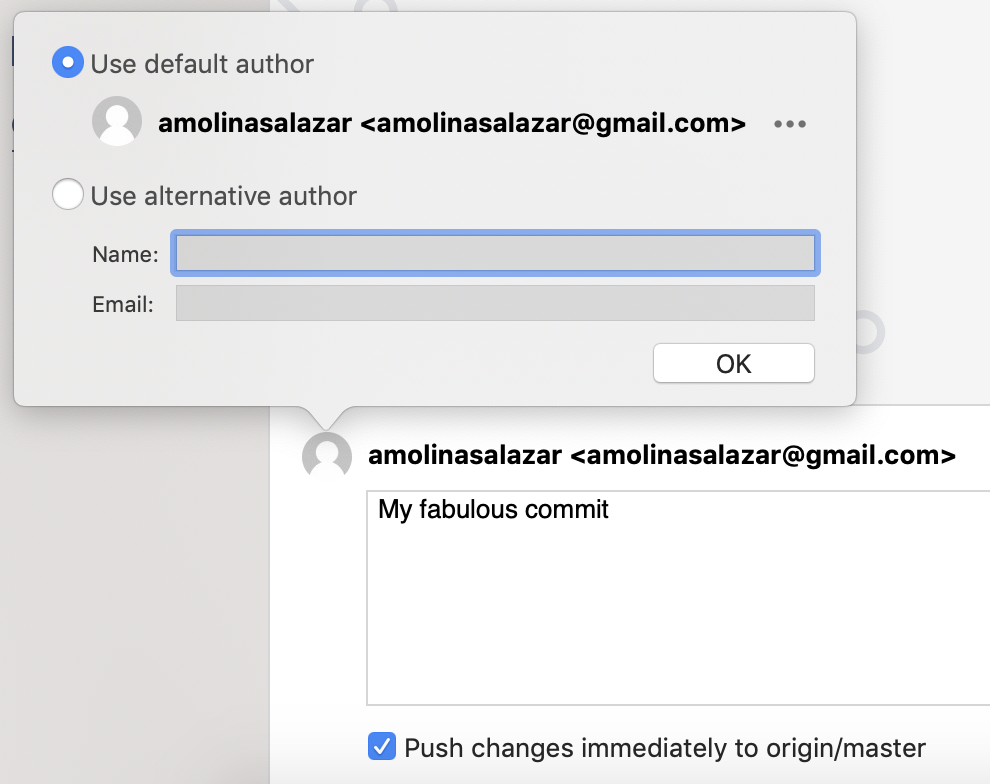
Make sure that you are using the option Use default author and your credentials are correct. If you use the second option, you will be signing your commit with an author different than the pusher of the commits. This means that you will see two users in the history when you check your commits in GitHub.
If you followed correctly those previous steps and the emails that you are setting in both computers match, you should be ready to start developing things.
I already did some commits with a wrong author… now what?
Don’t worry these things happens, that’s why Git implements multiple ways to fix this problem. Depending on the number of commits you want to amend or if they are already pushed to the repository, you’ll find more useful to rebase your history or directly reset from a good state. If you want to know how to do it, check this post where you can find a guide of the whole process.
Hi! My name is Alejandro and I’m Technical Lead (Full-Stack). I’m really interested on new technologies and programming skills. I also participated in some gaming development competitions. I hope you enjoy this blog! 😉